Gear

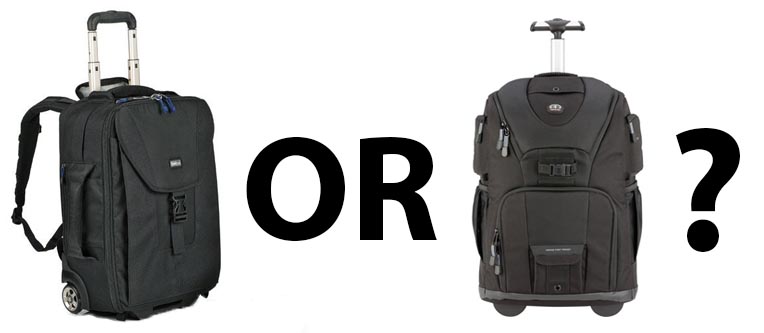
This man had to choose between a Think Tank roller bag and a Tamrac roller bag. His final decision will ROCK YOUR WORLD.

Tamrac or Think Tank?I want to give a special shout out and thanks to Emm from CheesyCam for recommending the bag that I eventually purchased to carry my gear to NAB. I was going back and forth between the Tamrac 5797 roller backpack and the Think Tank Airport Takeoff. Both can be used as a roller and as a backpack. I ended up purchasing both of them to test them out with different setups. Each of these are excellent bags. In the end, I returned the Think Tank.

The Tamrac won out for me because of one feature – the top loading compartment. I think that this is a smart use of space for run ‘n’ gun shooting. Because of this, you don’t need to lay the bag down in order to take your camera out. I can roll it up to location, unzip it and get my camera out quickly. When you do need to lay the bag down, the flaps are small so they don’t take up extra floor space.

Additionally, I can fit a GH3 (soon to be GH4) with a Honu Fhugen cage inside the top compartment. I had difficulty figuring out a way to fit that same setup easily into the Think Tank Takeoff due to its straightforward flat design.

Continue reading

My mini-doc, “A Cemetery Remembered” is now online!

I’m pleased to present my latest short-form documentary, “A Cemetery Remembered.” As I’ve mentioned in previous posts, this was a passion project of mine that I started last summer in 2013. I read an article in the L.A. Times which recounted the story of Mt. Zion Cemetery. It is located in East Los Angeles and had fallen into disrepair. Because of the story in the Times, a grassroots campaign was started by a local rabbi to restore it.

I pitched the story around to a couple of people, but realized that this was a project that I needed to pursue on my own. Well, sort of on my own. I enlisted the help of my amazing fiancé/producer (prodancé? fian-ducer?), Tina Nguyen, to help me out on the shoot and the edit.

We shot over the course of one day with the following equipment:

  • Panasonic GH2
  • Sanken COS-11D
  • Rode VideoMic Pro
  • Roland R-26 Field Recorder
  • LED 900 light
  • Kessler Pocket Jib Traveler
  • GoPro (footage was not used in the final piece)
  • Gripper 3025 suction cup car mount. Used with the GH2.
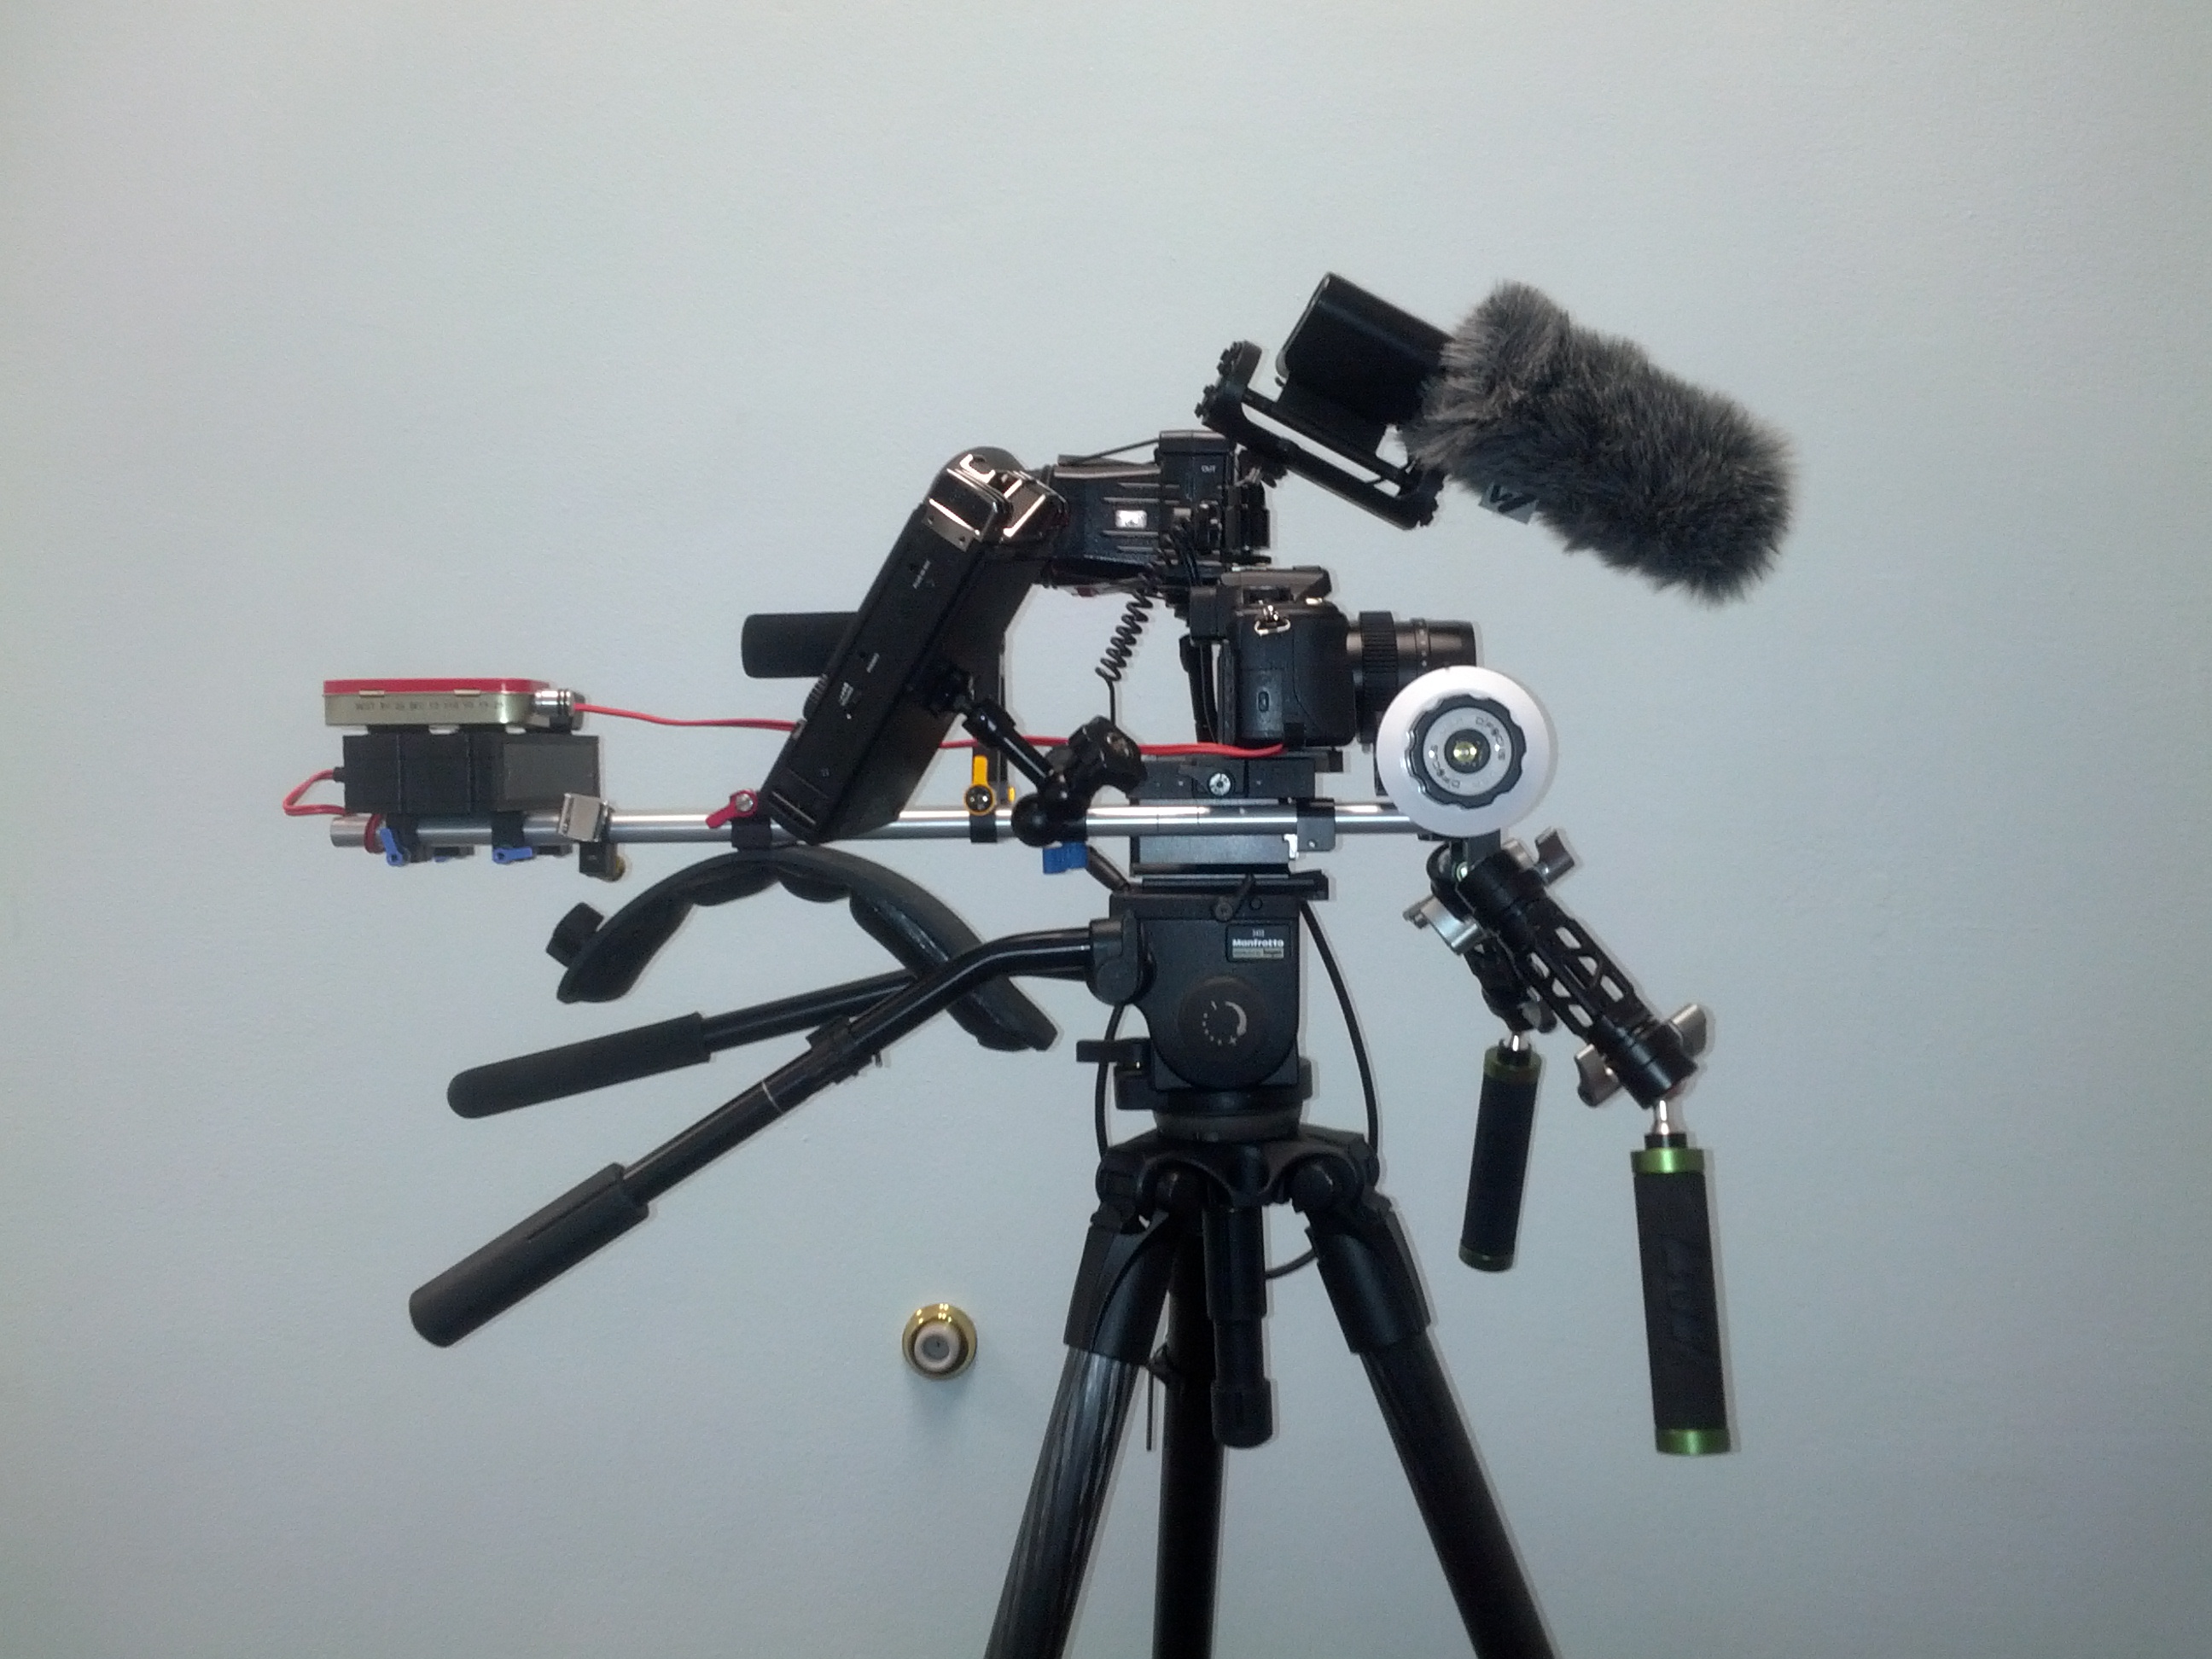
  • My home-made shoulder rig (AKA, The Spider)

I edited the piece in FCP X so that I could use it as a test bed for a larger documentary or other non-narrative piece. I’m happy to say that FCP passed the test.

X is great for this kind of project. And this project had it all: synced dailies from non-jam synced second source audio, multiclips, footage from different codecs, DSLR video, proxies, extreme color correction with lots of power windows and tracking, camera stabilization. I was even working off of a portable bus-powered $120 Buffalo Thunderbolt HD and moved between two systems.

I started the project late last year in 10.0.8 and then upgraded to 10.1 in December. The new Library-based system works extremely well. I finally feel that my hard drives, and consequently my own brain cells, are organized.

Backing up is simple and effective. I employed the use of Timeline Snapshots as daily backups of my sequences in addition to FCP’s built-in system of backing up (which, thankfully, I never had to use). The camera footage was backed up on a larger RAID.

Because of working on projects like this over the past year, I now feel 110% comfortable in the magnetic timeline. I can work as fast, if not faster, than 7. The key here is to create the dialogue audio bed first (the radio cut), then add music and b-roll. The radio cut generally drives the story and the music and b-roll support it.

Once everything is generally worked out in the timeline, the fine detail work begins. It’s then very easy to move sections and soundbites around without causing music which resides later in the timeline to go out of sync.

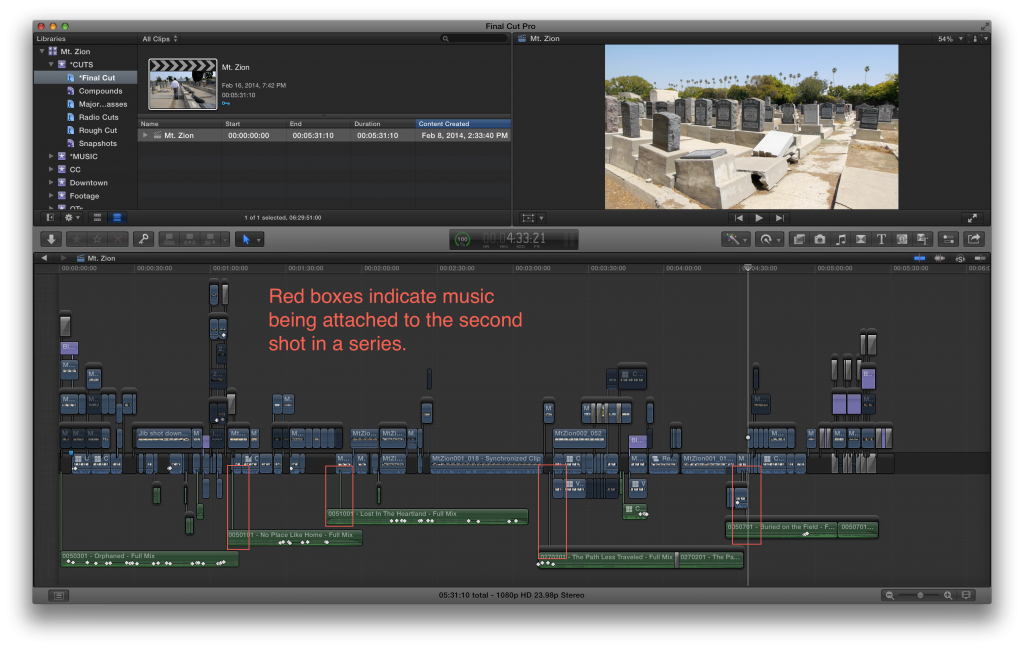
On this project, I would change the clip connection point of music generally to the second shot, since the first shot would have been an outgoing shot of the previous scene. When you get used to the magnetic timeline you start to think about relationships between clips. In doing so, you begin to think about story as opposed to what clip goes on what track.

Cemetery Remembered Timeline

X still has its issues and there are most certainly some major areas waiting for improvement. My two biggest request are as follows. I hope that Apple comes up with a way to organize audio clips based on roles. I’d also like to see a way to move the active clip indicator (that little white dot on top of clips) up and down so that you can edit with the keyboard more effectively in secondary storylines. There are also general responsiveness and playback issues that need to be fixed.

The good news is that, with the 10.1 update, I can clearly see Apple’s direction here and it’s all good. There is very little I cannot do with the app. Where there are problem areas in the software, I now have solid workarounds. We have clearly moved well beyond the days where I couldn’t work due to bugs. I’m now experiencing the opposite. I have so much control over the footage that I didn’t know where to stop!

All-in-all this was a great experience and I look forward to using the knowledge I gained on this short-form piece on longer projects.

I owe a huge debt of gratitude to Uncommon Library, who donated all the music tracks heard in this video. Their music can be licensed at uncommonlibrary.com. Please check them out and license some music from them!

More info on the restoration can be found at restoremtzion.com.

And now we wait…

I hate waiting. Admittedly, in many instances, I’m the one telling someone else to wait (to render, to upload, to let me find that shot). Because of my own impatience, I work my tail off to provide results faster than others. It’s not always humanly possible and it’s a very high bar to set, but I strive for it. And I usually come through.

So when I am in a position of waiting on others for things I really want, I get very fidgety (to put it mildly). In this case, I am waiting on three things, all Apple-related.

First item of business is my new iMac. I sold the old one in order to upgrade. I did this almost immediately within the launch of the new iMacs. I upgraded to it because of the 4GB graphics card. I ordered it eight business days ago. It still hasn’t shipped. There’s no way it’ll get to me by the latest expected date of Wednesday unless it overnights tomorrow. Here’s hopin’.

Screen shot 2013-10-07 at 3.45.22 PM

I feel a little silly to have made the upgrade now that the benchmarks came out and they are not as exciting as I had expected. The good news is my upgrade cost was only a few hundred dollars and the resale value will be higher than my last one if I had waited another year.

This leads me to the second item of business: the new Mac Pro. I am desperately awaiting its release into the wild. I have very high hopes for this beast. I hope it’s going to energize a lot of people to start up projects which will have a trickle-down effect to me. As has happened in the past, my hope is that a new Mac Pro on the market equals new work for me.

The final item of business is FCP X. I have no idea when it’s coming out. I have no idea what the new features will be. And I am dying to know. I’ve maxed out what I can do with FCP 10.0.x. Here’s hoping the next version is as great as the hype out there. I truly hope it is because… (please return to the first line of this post).

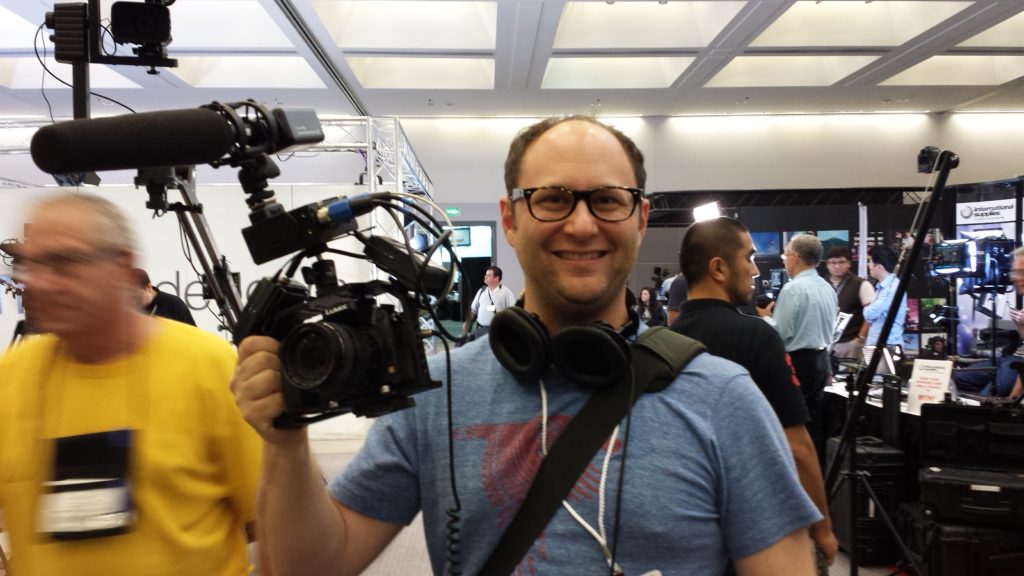
Me and “CrazyRig”

Thanks to Emm from CheesyCam for sending the pic he took of me and my newly dubbed “CrazyRig.” For those curious, it consists of the following:

  • Panasonic GH3 with 12-35mm f2.8 Lens
  • Honu Fhugen Cage (which is awesome)
  • JuicedLink RM202
  • Sony V5 Headphones
  • Two Sennheiser G3 receivers
  • Sennheiser 416 mic with an SKP-300 butt plug.

Yeah, I said butt plug.

20130925_142437

Bloggin’ around at DV Expo West 2013

I spent the day today at DV Expo 2013 at the LA Convention Center. While it was pretty sparse at the convention this year, I highly recommend you come out and meet the reps and manufacturers of some of your favorite products. It’s also great to get hands on demos of gear, such as the Movi.

Since I’ve been building out my GH3 cage rig, I decided to give it a test drive and perform some interviews and product demos with the vendors. I stopped off for a quick chat with Alzo Video, Adobe, Freefly, Beechtech, and Redrock Micro. I’ll post videos here as I time permits.

Also, it was great bumping into Emm from CheesyCam. We had a fun time making fun of me and my crazy rig with my 416 perched on top! 😉 I’ll post a pic here soon.

DVE13_WebHeader_V3opt

Hackintosh vs High-End iMac: Is It Worth It?

Hackintosh_logo_by_kossnocorp

This is a re-post from a response I recently added to a Creative Cow thread about the value of Hackintoshes. I built one late last year and I’m happy with it. But I know that happiness comes with a cost. The system does not have a high resale value and has many potential troubleshooting issues down the line.

I came to terms with the reason why I wanted to build one: because I wanted to know IF I could build one. It was a challenge which was frustrating but fun. I love learning about all the tech we use in our daily lives. It was a satisfying DIY project.

I ultimately feel that buying Apple provides a better value over building a Hackintosh. But you don’t necessarily gain knowledge about your system and it’s components if you purchase a Mac. It’s like buying a refrigerator. If it breaks, you call a repair man. You’re most likely not going to open it up and fix the compressor (unless you’re a repair man!). So you might never understand how a refrigerator, a very important piece of tech in your life, works.

—–

Hackintosh part prices below are current and possibly not reflective of what I paid. But it’s very close. This gets you mostly in parity with a top of the line iMac (minus Bluetooth and WiFi, which cost about $46 total for the components). Here are my specs:

Intel Core i7-3770K $320
Gigabyte GA-Z77X-UP5-TH (has 2 thunderbolt ports) $245
32GB 1600Mhz DDR3 $217
Corsair Carbide 500R $158
Corsair 650 Watt Modular $90
GeForce GTX 680 $497
480GB SSD Drive $363
Syba SATA III 6Gbps PCI-e Card $17
StarTech.com 3 Port 2b 1a 1394 PCI Express FireWire Card Adapter PEX1394B3 $63
Cooler Master Hyper 212 EVO: $33
I owned a Kona 3, which I installed and is working fine.

TOTAL: $2003

iMac System Specs:
3.4GHz Quad-Core Intel Core i7
8GB 1600MHz DDR3 SDRAM-2X4GB
1TB Fusion Drive
NVIDIAGeFrc GTX 680MX 2G GDDR5: $2600
AppleCare: $170
RAM from OWC: $270

TOTAL: $3040 (before tax)

Now, here’s the kicker. While Geekbench isn’t the be-all end-all, I think it’s a nice cross-reference for the technologically-barely-informed (such as myself ;-)).

My iMac 27″ top o’ the line gets a healthy 14268
The Hack Pro gets a substantial 14124

For all intents and purposes, they are equal systems. One costs $3014 and comes with a warranty. The other costs $2003, works great, and is expandable, but has risks. Again, if you need to purchase a monitor, keyboard and mouse for the Hackintosh, that will add an additional amount and bring them much more in line price-wise.

Let’s look at the percentage difference if we take out AppleCare to get the systems more in line.

iMac: 2845
Hack Pro: 2003
Percent Difference: %30

Now, let’s look at potential resale value and upgrade costs. This is assuming a new iMac will cost about the same amount in 2 years:

iMac late 2012 resale value in 2 years (conservative): $1250 
iMac 2014 (high end) potential cost: $ 2900
Out of pocket difference: -$1650
Time needed to reinstall software and test new system: 1 day (based on purchase of iMac)

Hackintosh upgrade option 1, resale and build from scratch:
Hackintosh Late 2012 Cost: $2003
Hackintosh Resale Value in 2 years: $400 
Hackintosh Late 2014 potential cost: $2000
Out of pocket difference: -$1600
Time needed to research new system and find best prices on parts: countless nights on Hackintosh boards
Time spent building system: 1 day
Time spent testing parts and debugging: 2 days (conservative)

Hackintosh upgrade option 2, upgrade CPU, Mobo, and RAM
New Motherboard, Processor, RAM (assuming all current PCI Cards work properly and base prices stay the same): $782
Time spent researching whether all parts will work with new system and what CPU/Mobo to get: 2-3 evenings on hack boards
Time spent installing new parts: 2 hrs
Time spent reinstalling OS, debugging: 1 day (conservative)

So there you have it. At most, there’s an $870 difference (not including time spent) in favor of an equally spec’d Hack Pro and a top-end iMac over a 2-year period. Divide that out by 2 years and that’s $37 per month.

The ultimate question I propose (which I’ve already answered for myself): Is it worth it for you to build one?
My current equipment wish list…

Here at “Production Central” as I’m now starting to call my company, I am getting excited about completing the current stage of my kit. I’ve come to understand that the kit is never finished. Newer, better equipment is always coming out. There’s a great market on Craigslist for used gear. So, once you buy in, your upgrade costs are much lower than the price of admission.

First off, I’m looking to get a jib. I’ve been doing tons of research and I’m currently eyeing this guy, the Kessler Pocket Jib Traveler.

It looks like a brilliant design and a great price. I’m hoping there will be some reviews soon. I could see traveling with this even on some upcoming overseas news shoots!

Next up is a new slider. I’ve been toying with the idea of getting either a Kessler Stealth Slider or the Philip Bloom Edition Slider. There’s also the Edelkrone SliderPlus. They all look amazing, but the prices on these are just too high.

So this led me to eye the Varavon Lite 800 along with a Motorroid. Specifically, the OliviaTECH edition,which is currently on pre-sale for $580 with shipping.

http://youtu.be/RvuGxtlq8LE

Personal-View.com is having a Varavon special today (3/18) only for a total of $540.

It’s an investment that will increase the production value of my shoots. I am currently pitching jobs to a couple of larger companies and institutions. This gear will go a long way to making their videos look great.

New Redrock Micro Shoulder Pad and Accessories Now Available

Redrock Micro Shoulder Pad Annoucement

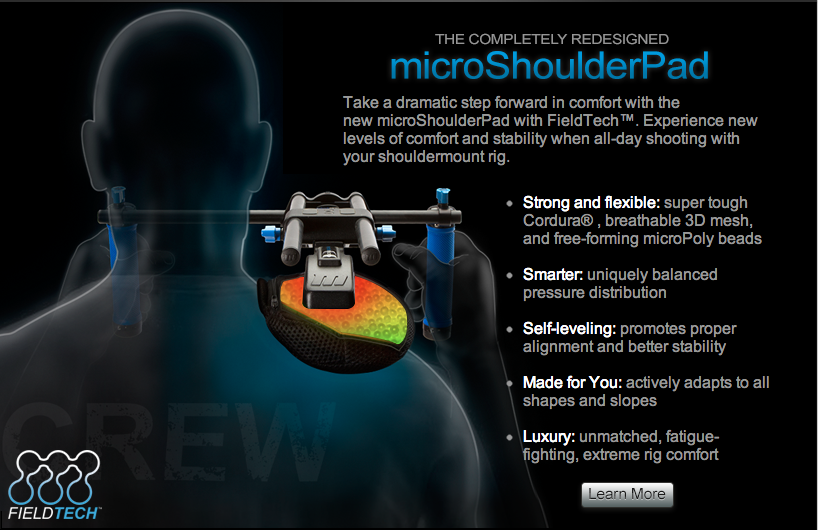
This is something I’m very excited about. Redrock Micro has announced the availability of it’s new shoulder pad and rig accessories.

I had the opportunity to try new shoulder pad out at Redrock’s booth at DV Expo in Pasadena a few months ago. I was initially very impressed.

Admittedly, I am a bit obsessed with my straight DSLR rig. There’s no one way and no perfect way to mount all the items you need to shoot for a day when using a DSLR camera.

Homemade Straight Shoulder Rig

One of the biggest problems I have encountered in mounting all these items to rails is the sheer weight. If you put 7 or 8 lbs in front of you, then you need to counter it with the appropriate amount of weight behind you. My rig comes in at about 15 lbs. That’s a lot heavier than the weight of a teeny tiny camera!

Basically, what many of us shooters are trying to do when building a rig is to replicate the ENG camera shooting experience while capturing that amazing cinematic DSLR look. Aaaand we are also trying to save a buck or two in the process.

I have tried 3 different shoulder pads. The two main issues I’ve had with these pads are that they cause shoulder pain and they lack the ability to reposition the camera horizontally. They don’t mold to the shape of your shoulder. So, it’s hard to get comfortable and even harder to get a level picture. I end up contorting my body to try to get a level image and at the end of the day, my back and body are tweaked.

I also like the idea behind Redrock’s microBalance Plus Cheeseplate because of the ability to slide the cheeseplate and counterweight left and right. Having lots of arm accessories on the left and right of the rig causes strange balance issues. My Roland R26 with XLR cables is mounted on the right and can cause the rig to lean to the right. My hope is that this will balance the rig so that it sits flat on my shoulder when combined with the new shoulder pad.

I have been shooting more news and docu-style these days. So, I’m looking to perfecting that all-in-one ENG camera experience, while maintaining the power of DSLR shooting. I’m going to test the Redrock Micro shoulder pad soon and will let you all know what my findings are.